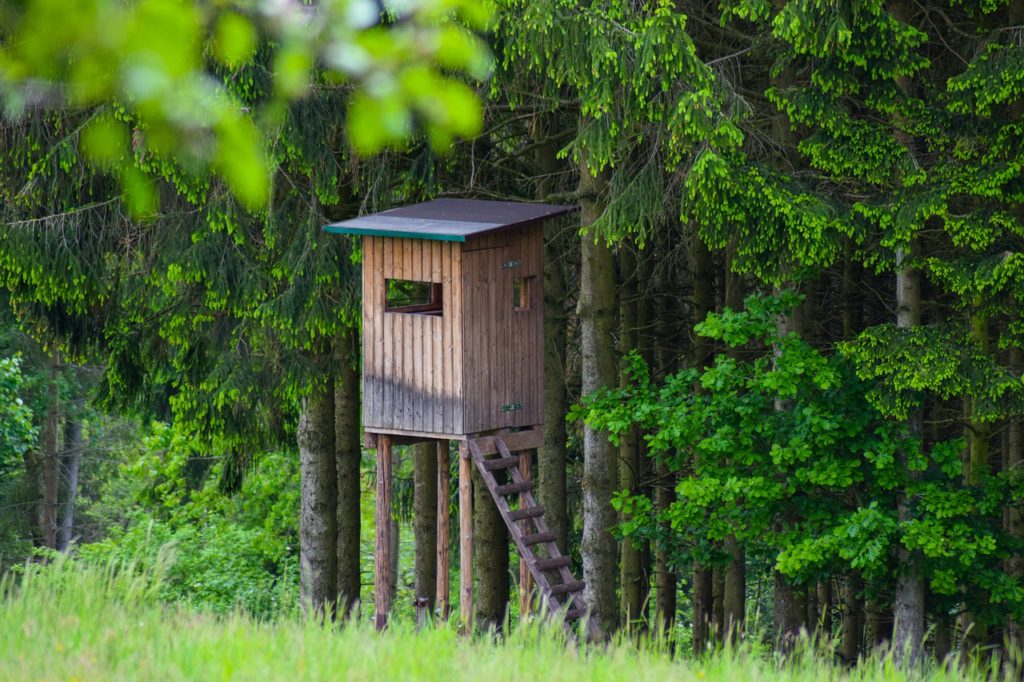
Having a permanent box stand large enough to carry two people irrespective of the weather is every hunter’s desire. But how can you actualize this if you don’t have the right knowledge and skills?
Building a durable hunting box strong enough to accommodate you and your spouse, friend, child, or someone going to hunt with you for the first time is a valuable asset.
Although the process involved can be a bit daunting, especially if you’re on a budget. The question is, how can you improvise to get a durable box stand?
In this article, you will learn some practical steps on How to Build a Box Stand for Deer Hunting that is affordable yet durable enough to lasts for a long time. So without further ado, let’s get started.

How to Build a Box Stand for Deer Hunting
The entire process requires the following tools:
- Four 8-foot-by-4-inch- by-4-inch treated posts.
- Heavy-duty steel brackets.
- Bolts with washer.
- Handrail and nails.
Before we start building the box stand, watch this video.
Dimensions and Plan
Using the right dimension will help you gain a perfect structure. The floor needs to be erected 7 feet above ground level. And the side dimension should range within 6 by 4 feet; this will accommodate your height perfectly, making it easy for you to get in and out of the box stand quickly.
The box stand should be framed with 2×4 inches of wood, and the door frame should be 12 inches in size. Using a plywood sheet of ¾ inch on the exterior part of the floor will be a perfect idea since it produces enough strength that can accommodate your weight.
Here is a video with some of the popular plans for a 4X6 stand.
Build the Base
Since the box is 7 feet above ground level, one of the safest ways to build the box is to ensure the base is durable enough to carry the weight and number of people it is meant to carry. Once you assemble the box, the platform should be raised with caution on 4×4 wood.
You can use an EZ bracket to get the platform ready since the tool makes the process pretty easy and faster. You will need to cut 2×6 inch x 8-foot board into 42 ½ pieces of an inch. Then proceed to cut 2 x6 x 8-foot size board into two different 45-inch pieces, this will be used on the floor joists.
Arrange the 66 1⁄2 inch and 42 ½ inch pieces using EZ brackets. Once that is ready, use the guide pocket and create a 4 by 6-foot frame. Mark out the holes where you intend to drill on the board and ensure each hole is drilled properly. Now secure the entire board using an EZ bracket of 5/16 bolt lock nuts and washer.
Here is a video on why a base platform is critical for stability and ease of use.
Assemble the Frame Onsite
To attach the box frame to the platform created, you will need to cut two different 2×4 inch x 8-foot boards into a length of 78 inches; this is meant for the higher part of the box, make sure you cut two boards into 75 inches on the lower part. With the aid of a long level framing square, grade to make sure all the corners on the box are vertical.
Bolt up the corner boards using an EZ bracket with the aid of 3/8 x 16×3 inches using a carriage bolt, hex nuts, and washers.
The next phase is to ensure all shooting openings are located in the proper position for proper shooting and aiming. The shooter is required to sit on a chair; make sure the chair has the right dimension and height that won’t obstruct the shooter.
Install and Elevate the Box Stand
At this point, the box stand should be ready, except for the floor and the platform base. The next step is to move it to the location where the box stand will be mounted. Once you’re at the location, slip the 4×4 inch post using the EZ bracket and attach it using lag bolts, confirm that each of the brackets holds the joint firmly. With enough help and caution, move the box stand into the position.
Mark out the spots and create holes with the right depth and dimensions capable enough to support the entire weight of the box stand. Sit the platform into the holes you created and ensure it is properly leveled. If it’s not, make the necessary adjustments to ensure the box sits perfectly in the hole. Once all is set and done, empty a bag of Quikrete into each hole. And allow it to last for 2- 3 days.
Once the platform is placed correctly into the concrete, use 2 x6 inch x 8-foot wood that is remaining to create ascending and descending stairs, which will be placed at the center of the box stand. The stair is designed to make ascending the platform pretty easy. You can also make sure each step is securely in place using four different 3/8 x 3-inch lag bolts with washers to ensure it is fixed firmly.
Having on slop on the stairs is optional. You can incline the stairs to 600; this will make it easy for both elders and young, although there are box stands with 900 ladders inclined as their source of entrances; it all depends on which appeals more to you.
You can also watch this video on how to build, install, and elevate your new box stand.
Customize Your Stand
As with ladder versus stairs above, there are tons of options and choices to make when it comes to building an elevated box stand. Some prefer to have the door space of their box stand open. While others love to wrap the entire stand with heavy camo or tarp which extends over door openings. You can install the best trail camera under $100 to track deer movement.
Depending on the climate of your location, you can insulate your box for warmth, by adding a gas heater to help keep you warm all through the hunting period.
Once the box is completely built and well painted, you will need to add a folding cushion and chair; then, you are good to go! As a hunter, your box stand should be one of your hunting assets since it serves as an emergency shelter during bad weather, a perfect spot to aim and take wildlife photography and shots.
I believe you enjoyed all the above procedures on how to build a box stand for deer hunting. In my opinion, the box stand has been one of my edge-cutting advantages when hunting deer; it allows me to spot them out and take them down without much stress. If it works for me, I believe your experience won’t be an exception. Please feel free to leave a comment below if you any questions or suggestions.
References and Further Reading
- 11 Free Deer Stand Plans
- 20 Free DIY Deer Stand Plans and Ideas
- How to Build an Inexpensive Hunting Blind
Last Updated on April 15, 2025 by Marty Prokop